~ How To ~
Paint Zebra Strips
A few small steps
to make a huge expression
Two tips to Remember: Use the right paint brush and keep paint constancy
from becoming too thick while painting by adding a very small amount of water!
First Mix a small drop of water and a portion of black paint together. You want the paint to move smoothly over the surface., adding water helps. Next, using an angled paint brush, dip heavily into paint/water mixture.
Start painting at a tip.
~
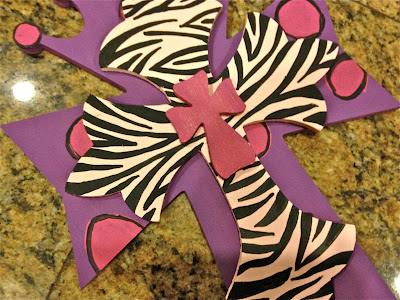
Make your first strip by painting an irregular triangle. Thinnest point always being on the inside. Then add another irregular triangle on the opposite side. Repeat. The triangles with become more irregular and longer as you work your way up the cross.
As you work your way up,
add larger outlining triangle, to your smaller ones.
Keep working your way up the cross, by using steps one and two.
Where space allows add triple triangles!
Once you have completed one side of the cross,
duplicate it on the opposite side, as pictured above!
Turn cross around, so unpainted portion is closest to you.
Start at tip and repeat the design used on the opposite end
of the cross by making more irregular triangles.
Work your way into the rest of the strips to complete design!
The pattern that makes up a zebra’s skin is erratic,
so get erratic with it and most of all, have fun doing it!
~
This Project was Brought to you by
Jessica Sawyer
Build-A-Cross Crafter


No comments:
Post a Comment